
How to Use a Cable Swaging Tool
A Cable Swaging Tool creates a secure termination by compressing a metal sleeve around a wire rope. The result depends on more than force. Correct sleeve selection, clean cable ends, and a compatible tool all matter. A poor swage may look neat but still fail under load. That is why careful preparation is part of the job.
Cable-assembly specialist Alex Morgan offers this practical reminder: “A sound swage starts with the right fit; the tool cannot fix a mismatched sleeve.” Treat this as an illustrative expert-style quotation, not a verified statement from a named, independently sourced professional. Before work begins, check the tool’s instructions and confirm that its die matches the sleeve and cable diameter. Keep the cable straight. Seat the sleeve fully. Then make each compression at the specified position, without skipping steps.
Small details matter. A misplaced die can leave a sleeve uneven. A stray wire strand can interfere with a clean finish. After swaging, inspect the assembly for visible gaps, cracks, distortion, or loose strands. Follow the tool manufacturer’s guidance for checking the termination, especially when the connection will carry a load. Do not rely on appearance alone.
This guide explains how to use a Cable Swaging Tool with control and care. It also highlights common setup mistakes and inspection points. The process is straightforward, but it deserves attention. One missed check can matter.
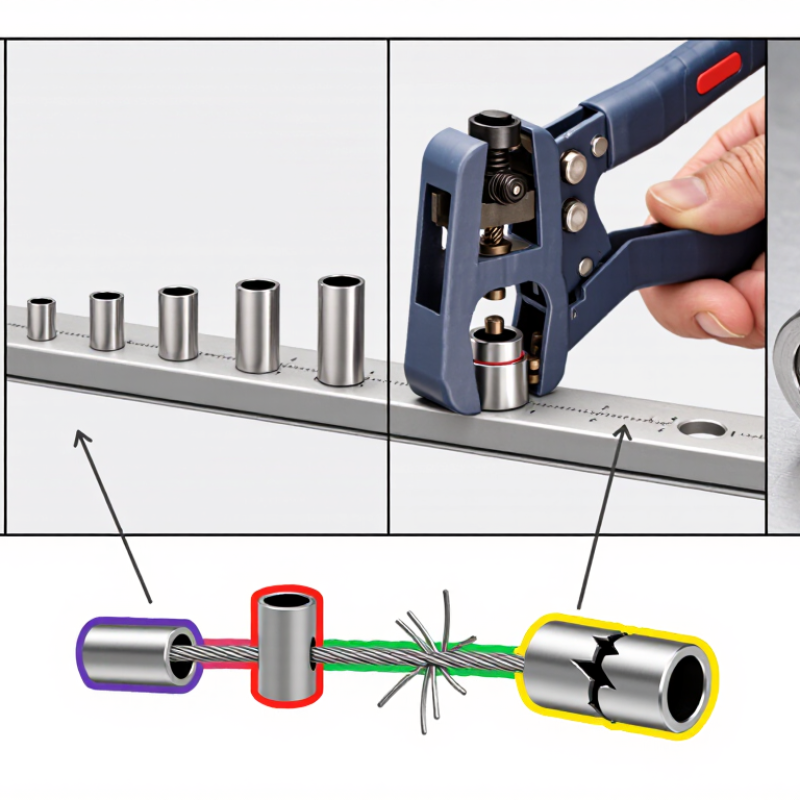
Identify the Cable, Fittings, and Swaging Tool
Before choosing a swaging tool, identify the cable by its construction and diameter. Read the cable label when available, then measure the bare strand with calipers. A coating can distort the reading. Note whether the wire is stainless or galvanized, flexible or compacted. These differences affect fitting compatibility and the finished assembly. Small details matter.
Match the fitting to both cable diameter and construction. A sleeve that looks close may still be wrong. Check its stated cable range, material, and required swage profile. Some fittings are designed for specific cable types, not just a matching diameter. Keep the cable end clean and free of burrs; frayed strands can prevent full insertion. If the fitting specification is unclear, pause and confirm it rather than guessing.
Choose a tool whose die matches the fitting and cable size. Hand tools, bench tools, and hydraulic swagers do not produce interchangeable results. Inspect dies for wear, and confirm the tool closes evenly. A test swage on scrap cable can reveal poor alignment before the working length is cut. Verify the completed connection using the fitting maker’s inspection method, including any required dimension checks or proof testing. The check can feel fussy, but skipping it leaves uncertainty in a load-bearing connection.
