
How to Wire a 7 Pin Trailer Socket Correctly?
Wiring a 7 Pin Trailer Socket correctly is more than matching seven colored wires. It is a safety-critical connection between your tow vehicle and trailer. Each terminal must carry the correct function, including tail lamps, brake lamps, indicators, reverse power, ground, and auxiliary supply. A single loose earth wire can make several lights fail together. That small fault may appear only when rain reaches the connector.
Mark Polk, a respected RV electrical educator, offers a practical reminder: “Test every circuit before you tow.” His advice reflects real workshop experience. A wiring diagram gives direction, but careful testing confirms the finished connection. Wire colors can differ between vehicles, sockets, and aftermarket harnesses. Never trust color alone. Confirm each circuit with a multimeter, a test lamp, or a dedicated trailer tester.
This guide explains how to identify the socket terminals, prepare the cable, and secure every connection. You will see why the ground wire deserves extra attention. You will also learn how to inspect pins for corrosion, loose screws, and damaged insulation. Keep the process simple. Work slowly.
There is room for human error. I have seen correctly arranged wires fail because one terminal screw was barely tight. Another common mistake is confusing the viewing direction of the socket. The diagram may show the front, while you are holding the rear. That detail matters.
Before connecting power, isolate the vehicle battery where appropriate and compare the pin layout with your equipment manual. A final lighting test should cover every function, including the brakes, indicators, and reverse lamps. Careful wiring is not glamorous, but it prevents dark surprises on the road.
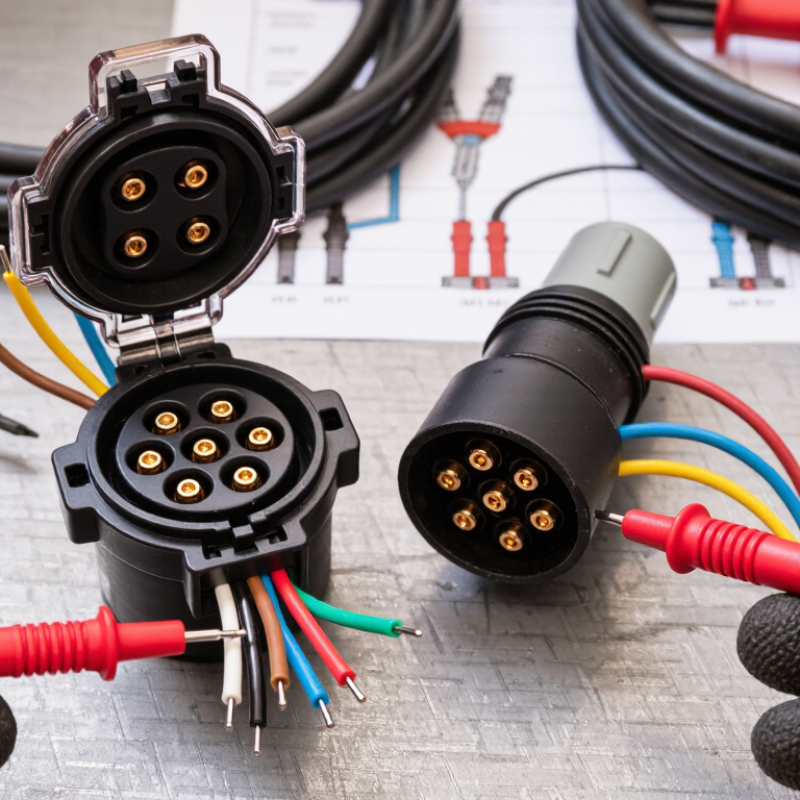
Identify the 7-Pin Trailer Socket Layout and Wiring Functions
How to Wire a 7 Pin Trailer Socket Correctly?
The seven-pin layout depends on the socket standard, so identify it before touching any wire. A common ISO 1724 arrangement uses pin 1 for the left turn signal, pin 2 for the rear fog lamp, and pin 3 for earth. Pin 4 operates the right turn signal. Pins 5 and 7 control the right and left tail lamps, while pin 6 supplies the brake lamps. View the socket from its mating face, because the pin direction may appear reversed from the rear.
Australian seven-pin flat sockets often use a different function map. Pin 1 usually serves the left indicator, pin 2 the reverse lamp, and pin 3 the earth return. Pin 4 operates the right indicator, pin 5 the electric brake circuit, pin 6 the stop lamps, and pin 7 the tail lamps. Wire colors can help, but they are not universal. Never trust color alone.
Use a wiring chart and a multimeter before crimping terminals. Check each pin with the vehicle lights switched on, then confirm the earth connection under load. Keep the test probe dry. My early wiring mistake was assuming two sockets shared the same layout; they did not. A loose earth can create dim lamps, strange signal behavior, or intermittent braking. Secure the cable away from sharp edges, leave a small service loop, and inspect every terminal after fitting. Do not force a connector that feels wrong.
